V4 Liquidity & Farming
V4 introduces concentrated liquidity, giving you more control over where your capital works inside a price range.
Instead of spreading your liquidity across the entire price curve as in V2, you can allocate it within a specific range to target higher yields, or use the auto mode if available for added convenience.
When you add liquidity, you become a liquidity provider (LP) and receive LP tokens that represent your position in that price range.
Step 1. Connect Your Wallet
On the interface of the Cypher app, click Connect and choose your preferred wallet (for example MetaMask).

Keep a little ETH in your wallet to cover gas fees.
Gas fees are small payments you make to process your transaction on Ethereum.
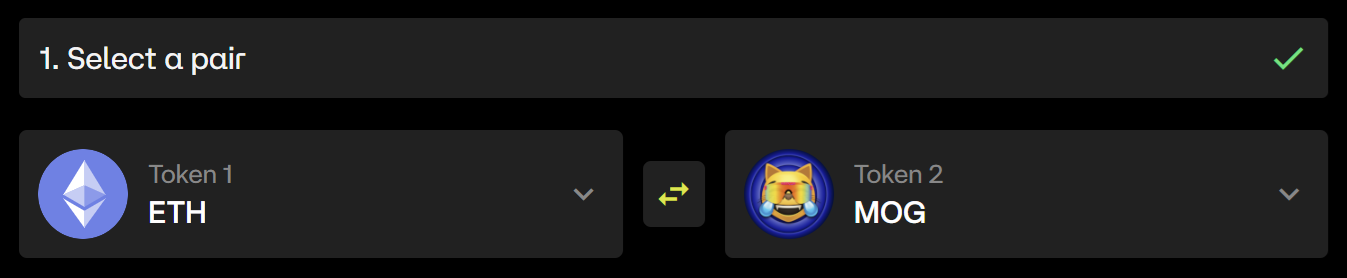
Step 2. Choose a Pair and Mode
Inside the app, open the Trade > Liquidity section and select V4.
Select the token pair you want to provide liquidity for — for example ETH / MOG.
Next, choose a liquidity mode:
- Manual – lets you define your own price range.
- Auto – automatically creates a balanced position around the current price.

Manual mode offers more control and higher potential yield.
Auto mode is easier for beginners
Auto mode means your liquidity is managed by one of Cypher’s integrated vault providers.
The vault automatically sets and rebalances your price ranges, so you don’t need to adjust them manually.
This also means the vault provider can realize impermanent loss at any time it rebalances your position if the liquidity moves out of range.
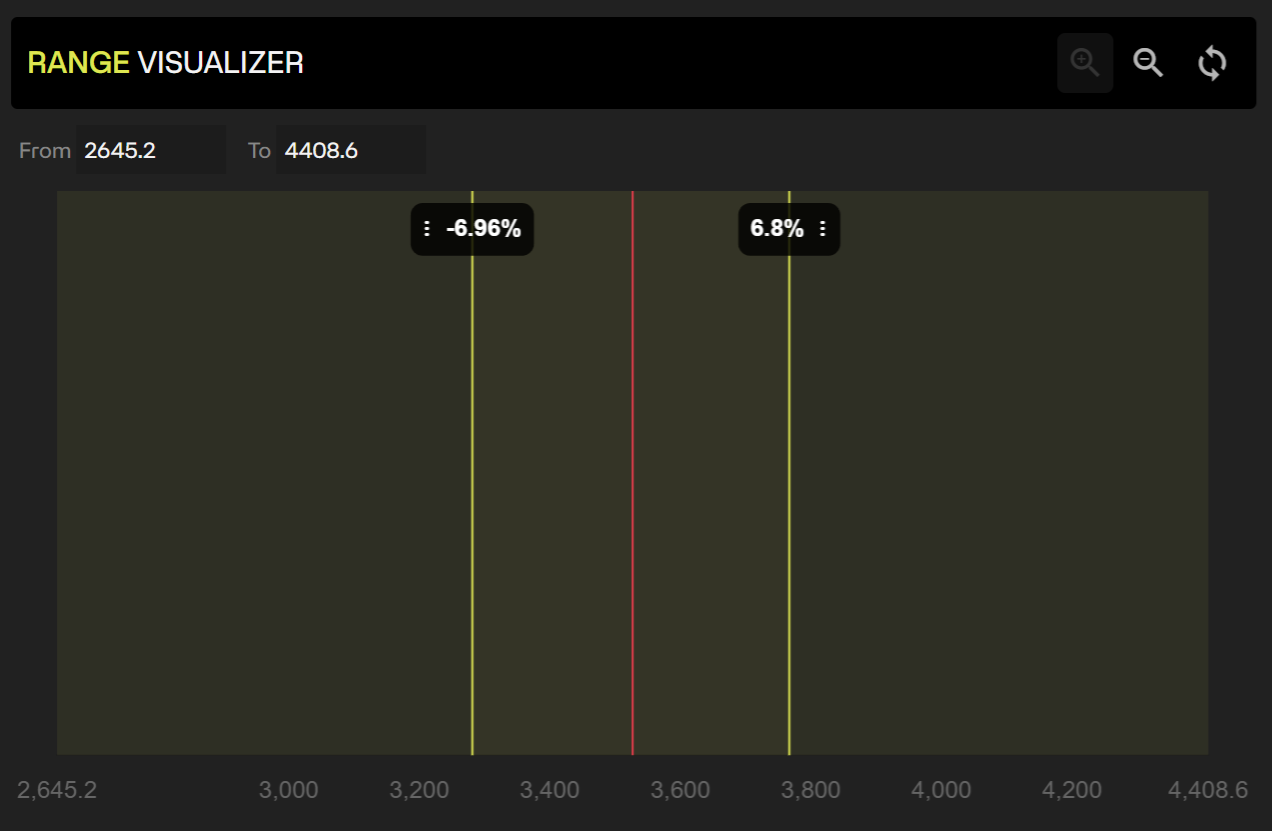
Step 3. Set a Range
In manual mode, you can set your price range — this is where your liquidity will stay active.
You’ll see the current market price and a Range Visualizer showing where your capital will be concentrated.

You can use presets for convenience:
- Full range — covers the entire price curve (similar to V2).
- Wide / Common / Narrow — progressively tighter ranges around the current price.
The tighter the range, the more trading fees you can earn — but the more often you’ll need to adjust if the market moves out of your range. When the price leaves your range, your position becomes inactive until the market returns or you update it.
Choosing a narrow range can multiply yield but also requires active management.
If you prefer a hands-off approach, use a wider or automatic range.
To check where liquidity is currently active at any time, open the V4 Liquidity panel, select the token pair, and view the Range Visualizer.
Step 4. Input Amounts
Enter how much of each token you want to deposit.
The app will automatically calculate the required ratio based on the current price and your chosen range.
Approve each token when prompted, then click Approve followed by Add Liquidity and confirm the transaction in your wallet.


Once confirmed, your position will appear in Earn > Positions with details such as range, value, and earned fees.
Step 5. Earn Fees and Rewards
As trades occur inside your chosen price range, you earn trading fees proportional to your share of active liquidity.
Fees in V4 are not auto-compounded — they accumulate separately and must be harvested manually from the Positions panel.
Incentivized pools with additional rewards such as oCYPH or other tokens can be viewed on the
Earn > Campaigns page.
Any additional rewards earned by your positions must be harvested separately on the Positions page.
Look for the Market Maker panel.

To maximize yield, monitor your range and adjust it when prices move significantly.
Step 6. Manage or Remove Liquidity
You can add more liquidity to your existing position at any time while it’s active within the same price range.
If you want to change the price range, it’s not possible to edit it directly — you must first unbind your position and then create a new one with the updated range.
- Go to Earn > Positions.
- Locate your active position.
- Click Add to increase liquidity, or Unbind to remove your position.
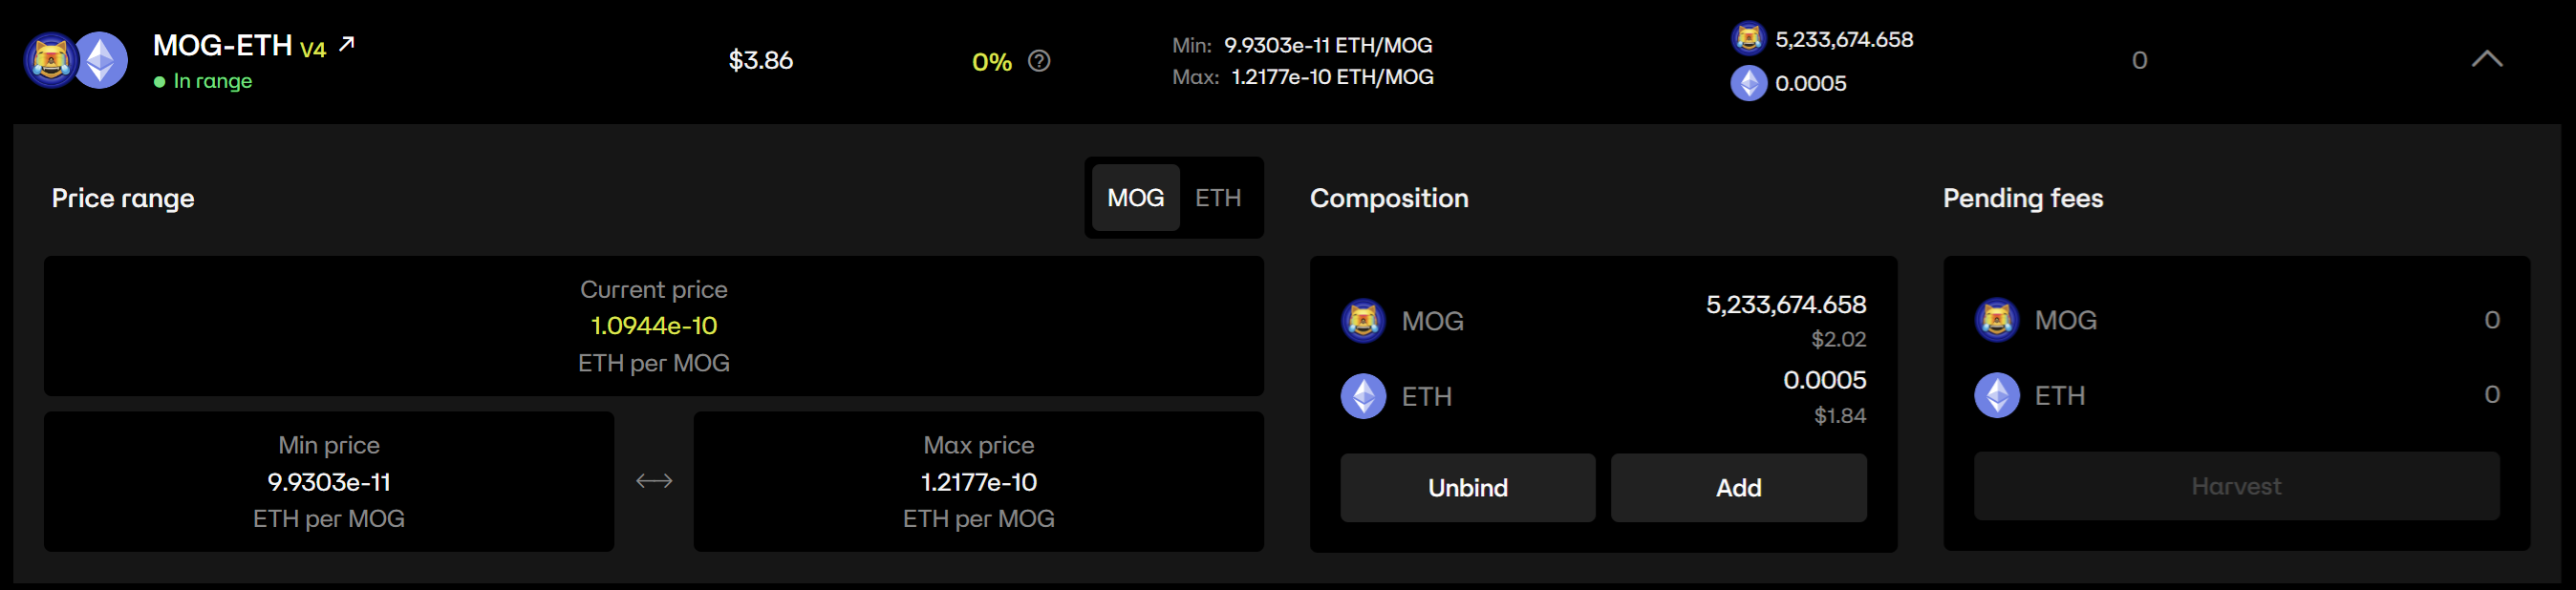
Any accumulated trading fees or rewards shown under Pending Fees can be claimed using the Harvest button before unbinding your position. Look for the Pending Fees panel inside each position.
Key Things to Know
- V4 uses concentrated liquidity — your funds only earn fees while the market price stays inside your selected range.
- Fees in V4 are not auto-compounded - they accumulate separately and must be harvested manually from the Positions panel.
- Manual mode gives full control of your price range and yield strategy.
- Auto mode is managed by vault providers who handle ranges and rebalancing automatically.
- Narrower ranges can generate higher yields but may go inactive more often if prices move outside your range.
- Wider ranges offer more stability and less need for adjustments but typically earn lower yields.
- You can add or remove liquidity anytime.
Risks to Understand
Price Range Inactivity
If the market price moves outside your selected range, your position stops earning fees until the price re-enters that range. You can also choose to unbind your position, which realizes any impermanent loss, and then add liquidity again with new range parameters.
Impermanent Loss
Impermanent loss happens when the price of one token in your pair changes compared to the other while your liquidity is active. As the pool rebalances, you end up holding a different mix of tokens — sometimes worth less than if you had just held both separately. It’s called impermanent because the loss only becomes real when you withdraw your liquidity.
Price movement within your range can still cause impermanent loss, similar to V2, though it’s amplified if your range is narrow.
Gas Costs
Adding, unbinding, or removing liquidity requires paying gas fees in ETH.
Gas costs vary depending on network activity — performing actions during periods of lower congestion is usually cheaper.
Frequent unbinding and re-adding liquidity can increase overall gas spending.
Quick Summary
| Step | Action | Result |
|---|---|---|
| 1 | Connect wallet | Ready to interact with Cypher |
| 2 | Choose pair and mode | Select tokens and decide between Manual or Auto |
| 3 | Set a range | Define where your liquidity is active |
| 4 | Add liquidity | Deposit tokens and confirm transaction |
| 5 | Earn fees and rewards | Active range earns trading fees and potential incentives |
| 6 | Manage or remove | Add, unbind, or withdraw liquidity anytime |
Always monitor your position range and start with wider settings if you’re new to V4.
A narrow range can generate higher rewards but requires active management.